January 16, 2026
by GForce Software
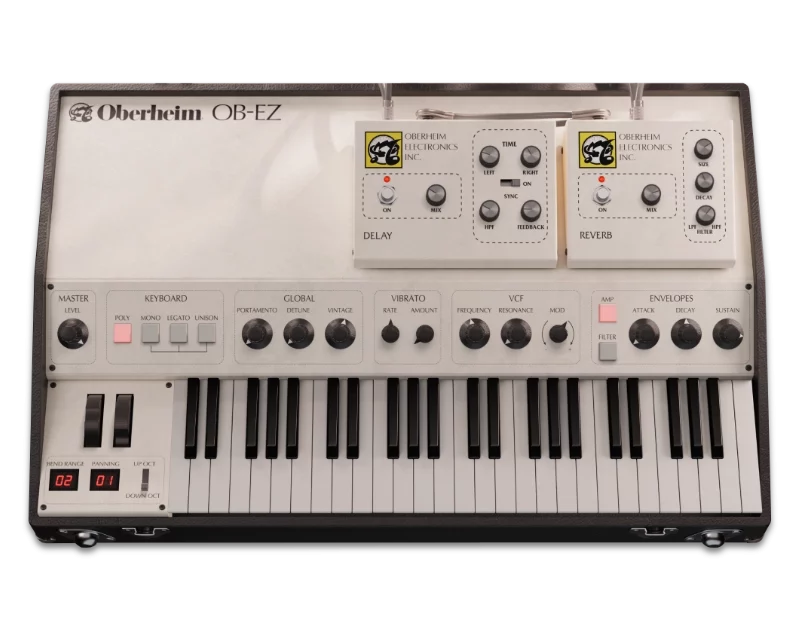
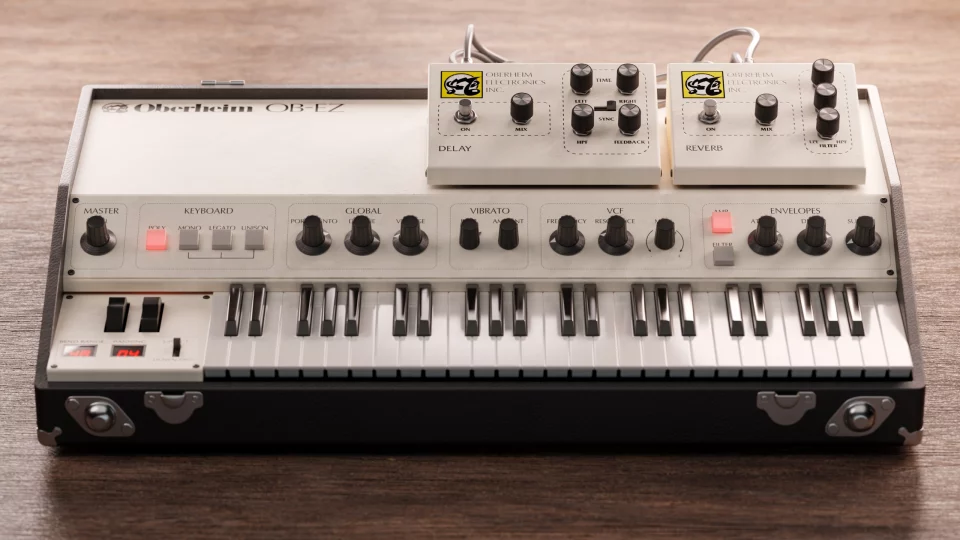
GForce OB-EZ takes the massive power of the GForce’s Oberheim OB-E synth and puts it into a focused interface designed for fast workflow. It’s perfect for browsing curated presets and then using its streamlined controls to tweak them to fit your song.
In this article, I’ll show you how to create a synthwave track using only OB-EZ. We’ll take four factory presets and edit them to create a retro-inspired sound perfect for synthwave.
Envelope Plucks
Let’s start with some syncopated synth plucks to build the song around. I wanted to start with a heavily detuned patch so I selected the Eight Voice Swell preset, which has a lush, wide sound. This is more of a pad preset, but we can edit the envelope settings to tighten it into something more percussive and rhythmic.
First, edit the amp envelope by lowering the attack to 0. Then switch over to the filter envelope and set the attack to 23ms, decay to around 350ms, set sustain to 0. These envelope times control how the filter moves when we play notes, and these settings give us a soft, brassy attack with a quick, snappy decay.
The original preset uses a dotted eighth note delay, but for this track I wanted a straight eighth-note delay to create that classic syncopated rhythm where the delay fills in the gaps. In the delay effect settings at the top of the interface, set both times, left and right, to 1/8th notes. Compare how the delay changes the feel:

Bass and Filter Automation
For the bass sound, I chose the Ball’s Bass preset, which is a chunky, aggressive bass pluck that uses the unison keyboard mode to stack synth voices to create a thick sound.
To keep this sound interesting throughout the song, we can use automation to gradually open and close the filter as the bassline plays. Since it’s a pluck patch, automating the filter modulation depth rather than the filter cutoff will keep the bass part of the sound consistent while varying the amount of ‘pluck’ when you play a note.
To add automation to the control, open the plugin’s parameter list by expanding the plugin in your DAW and choose the Global Mod Depth parameter. Then, use your DAW’s automation lanes to draw in automation curves that will gradually open and close the filter across your track. This is a great way to vary the amount of intensity through the song.

Lead with Detune and Vibrato
For the lead sound, I wanted something analog-flavoured with a bit of pitch instability. I started with the Classic OB Synth Brass 01 preset, which has a warm tone but sounds a little dry, so I tweaked it to add some movement and space.
Start by raising the Detune knob (under Global) to 1.5. Then increase the Vibrato Amount knob to around 0.32. This gives you a gentle pitch wobble from both oscillator drift and LFO modulation.
The preset only has a subtle delay effect by default, so I raised both the delay and reverb levels to 50%, and increased the Reverb Size to make the sound more spacious. For the lead track, I programmed a simple repeating arpeggio pattern. Here’s the tweaked synthwave version next to the original preset:

Octave-Doubled Bells
To add some high-end sparkle, I used the Shallow Pluck preset as a bell sound and made a few quick envelope tweaks to shorten the attack and decay.
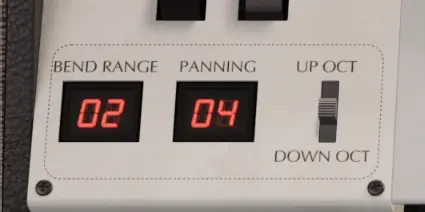
For extra stereo width, I adjusted the Panning control at the bottom-left of the interface. This setting randomly spreads notes across the stereo field, creating a wider stereo sound. OB-EZ has four width levels: 1 is mono, 4 is fully wide. Bass and lead sounds are best kept narrow, but since bell sounds are more decorative, they’re a perfect candidate for maximum width, so I set the panning to 4.
Putting to All Together
To finish off the track, I added a drum part using synthwave samples from Sonic Academy and Zenhiser sample packs. The drums are simple but effective, with classic tom fills to give that unmistakable ‘80s character. All of the reverb and delay effects come from OB-EZ’s built-in effects, and I added some EQ and compression in Ableton Live to shape the mix.
All the synths were sidechained to the kick drum to create a pumping effect, a staple technique in four-on-the-floor electronic music.
also layered in a different bass sound for the intro using the Vesuvius Bass preset, which plays for the first four bars before giving way to the chunkier Ball’s Bass for the main groove.