August 7, 2026
by GForce Software
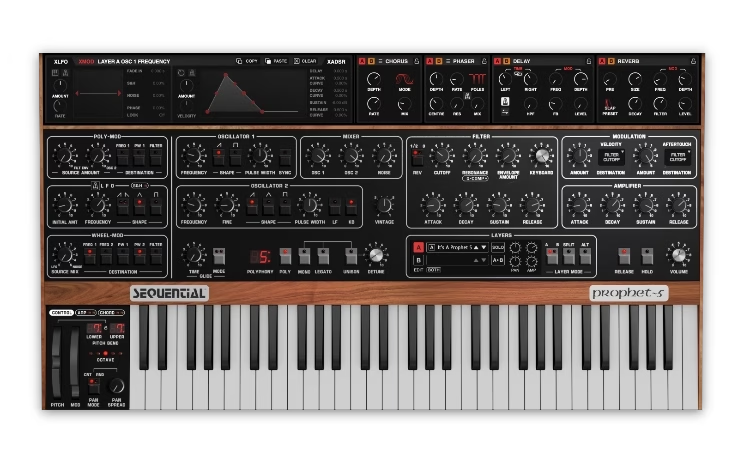
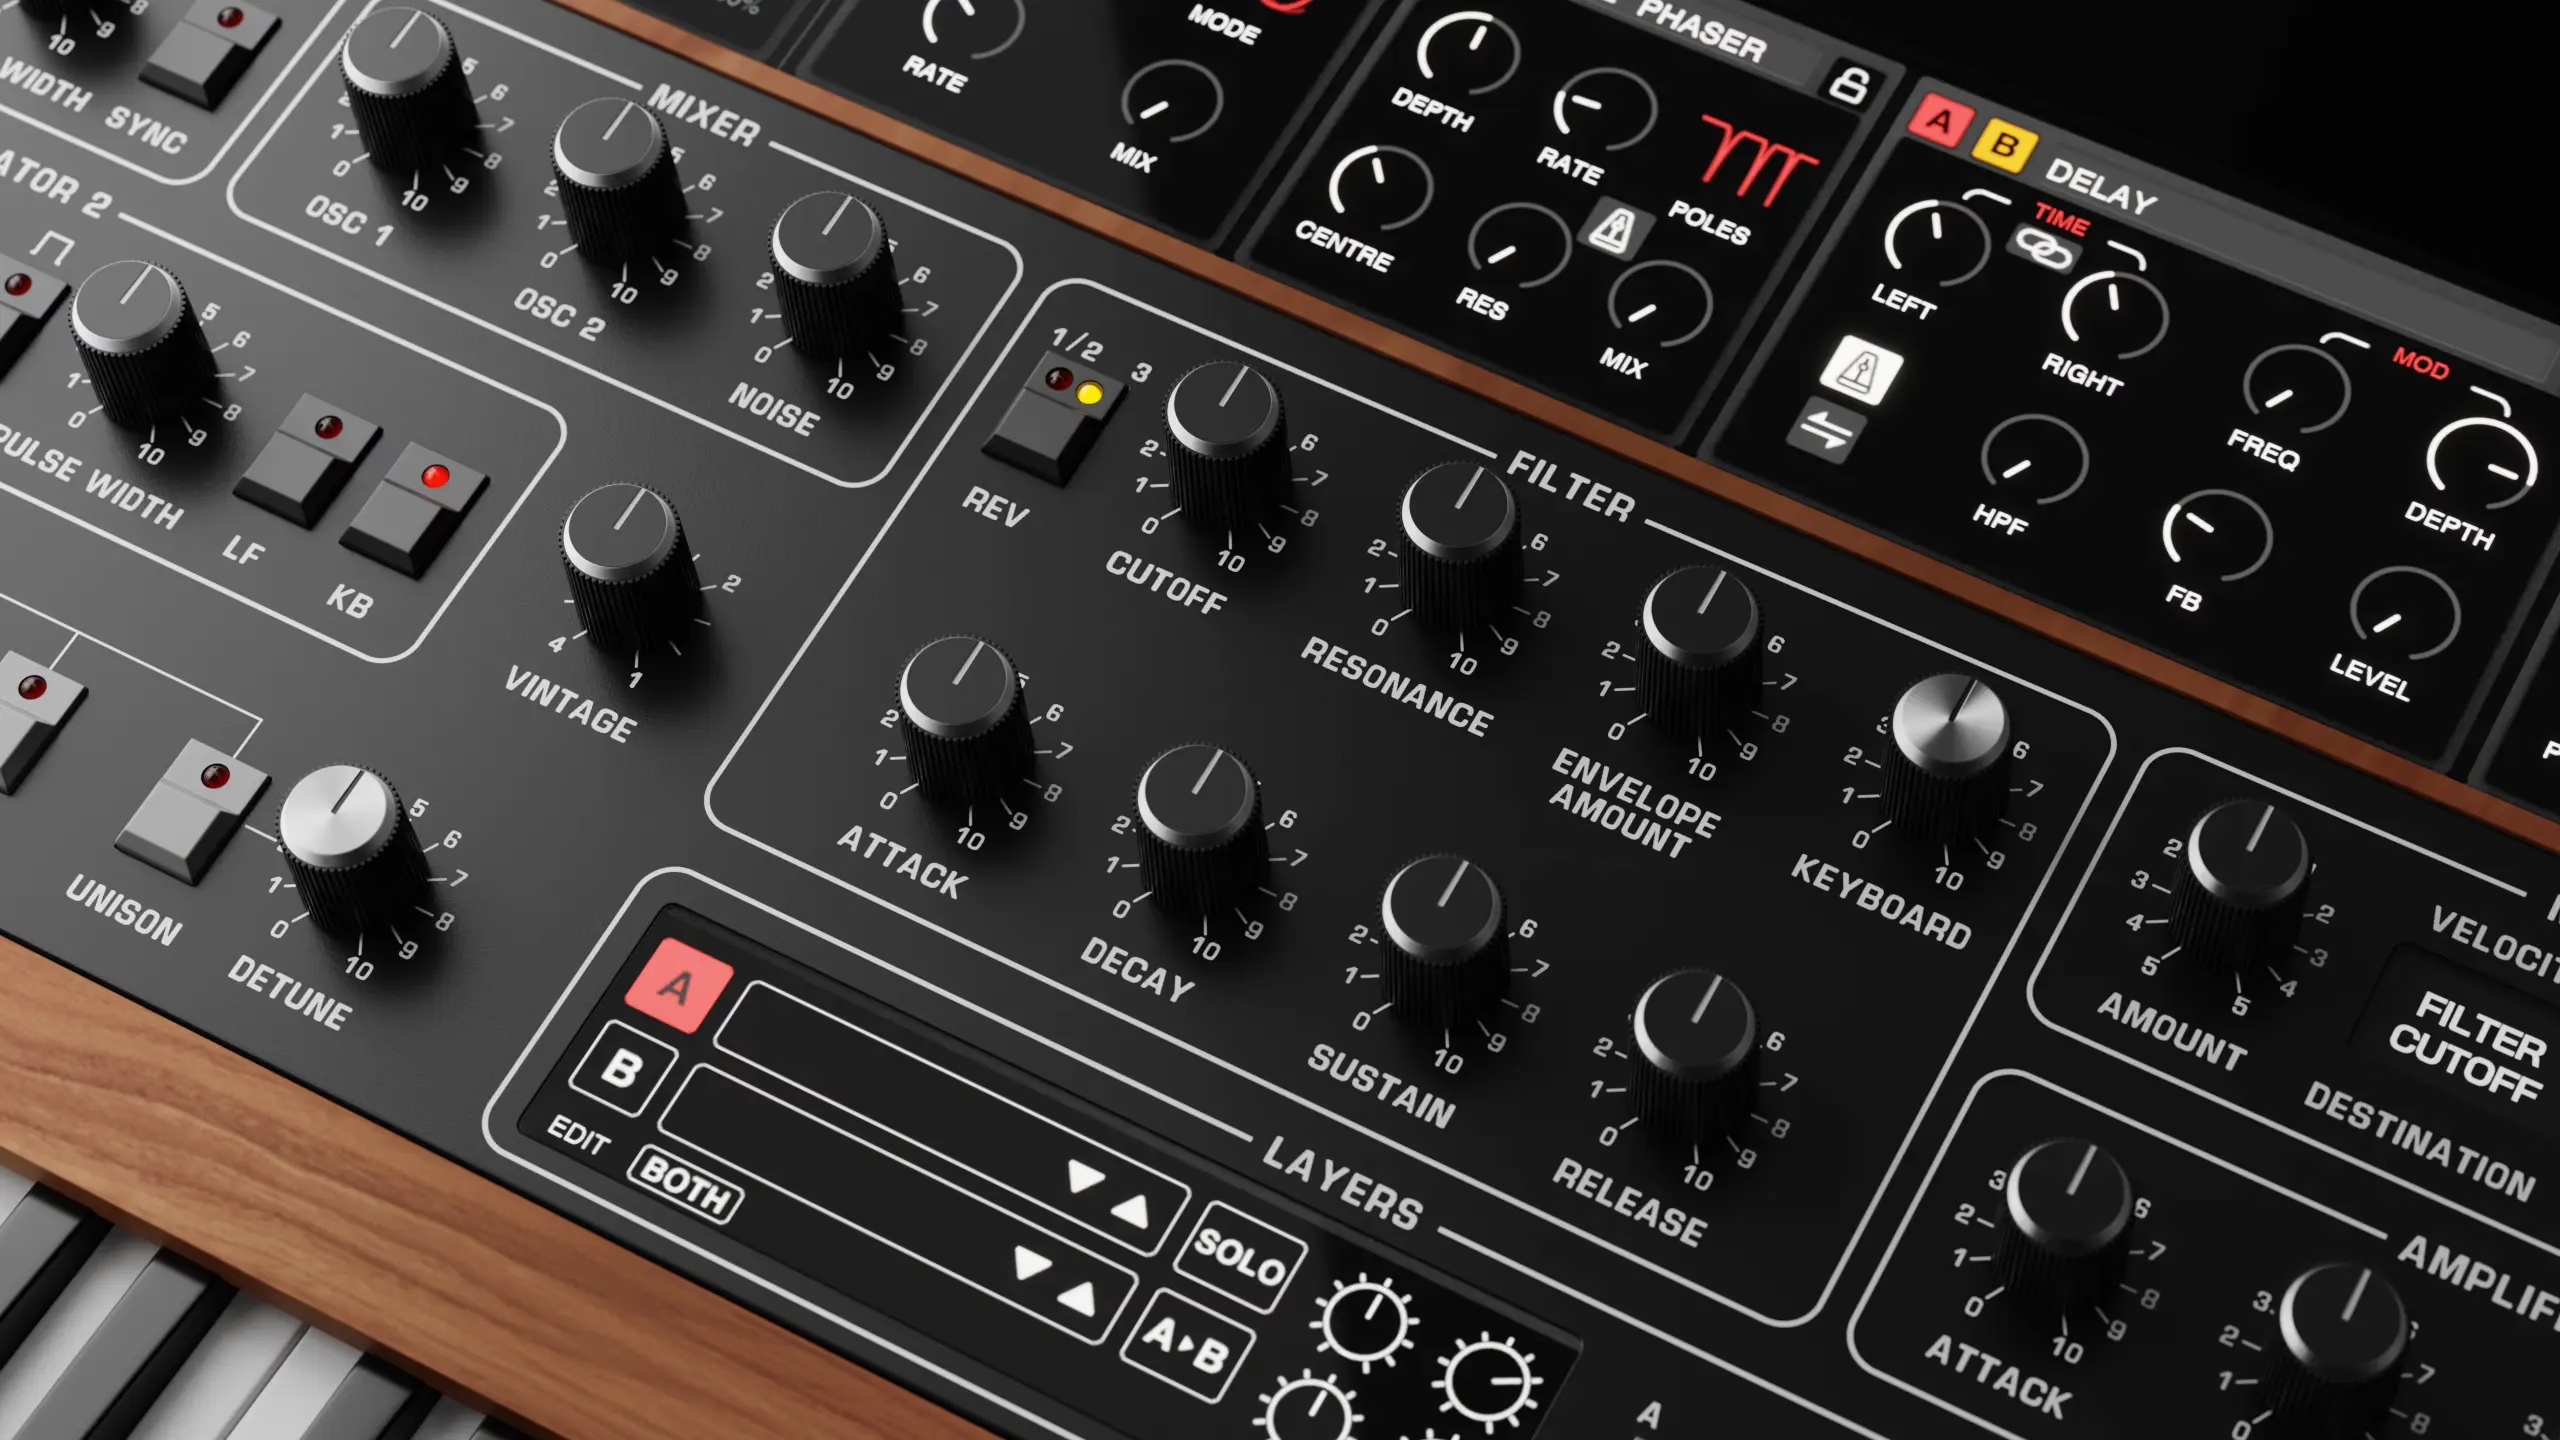
As part of the factory sound set for GForce Prophet-5, I put together two demo tracks to showcase some of my presets. For this first demo, I drew a lot of inspiration from Boards of Canada and Tycho and tried to make something that felt like an actual track. There are quite a few sounds in this demo, with the lead and basslines switching between different patches as the arrangement develops. Other than that, it’s largely built around a pad chord progression and some sampled drums for that trip-hop feeling.
Here’s the full demo:
The Fifths Pad
I started the demo by developing the chord progression. I used my Sundial factory preset, which is a fifths patch, meaning that one oscillator is tuned up seven semitones above the played note. Every note you play triggers two notes: your root note and a perfect fifth above it.
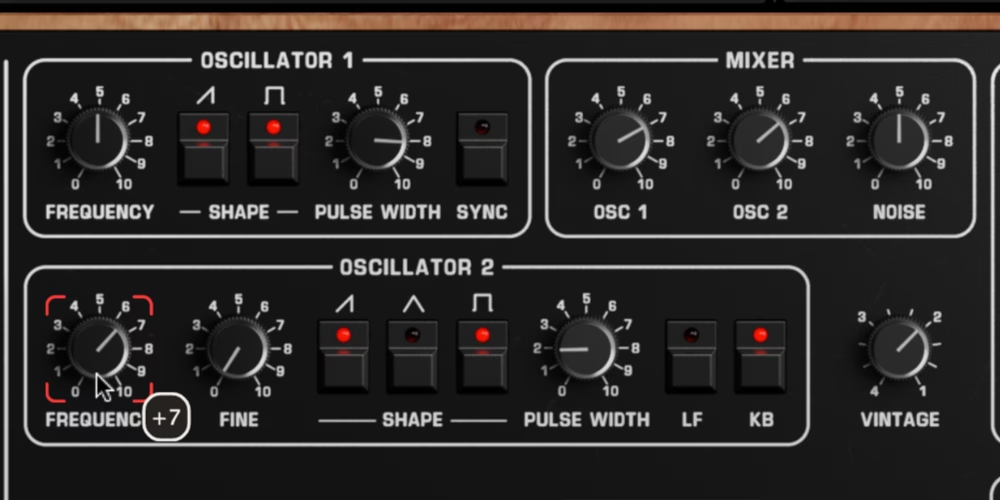
This is a creative way to come up with colourful chord sequences that you might not normally play on the keyboard. Because you’re always hearing two notes for every one you play, fifths patches work best when you play one or two notes at a time, which is what I did for this progression:
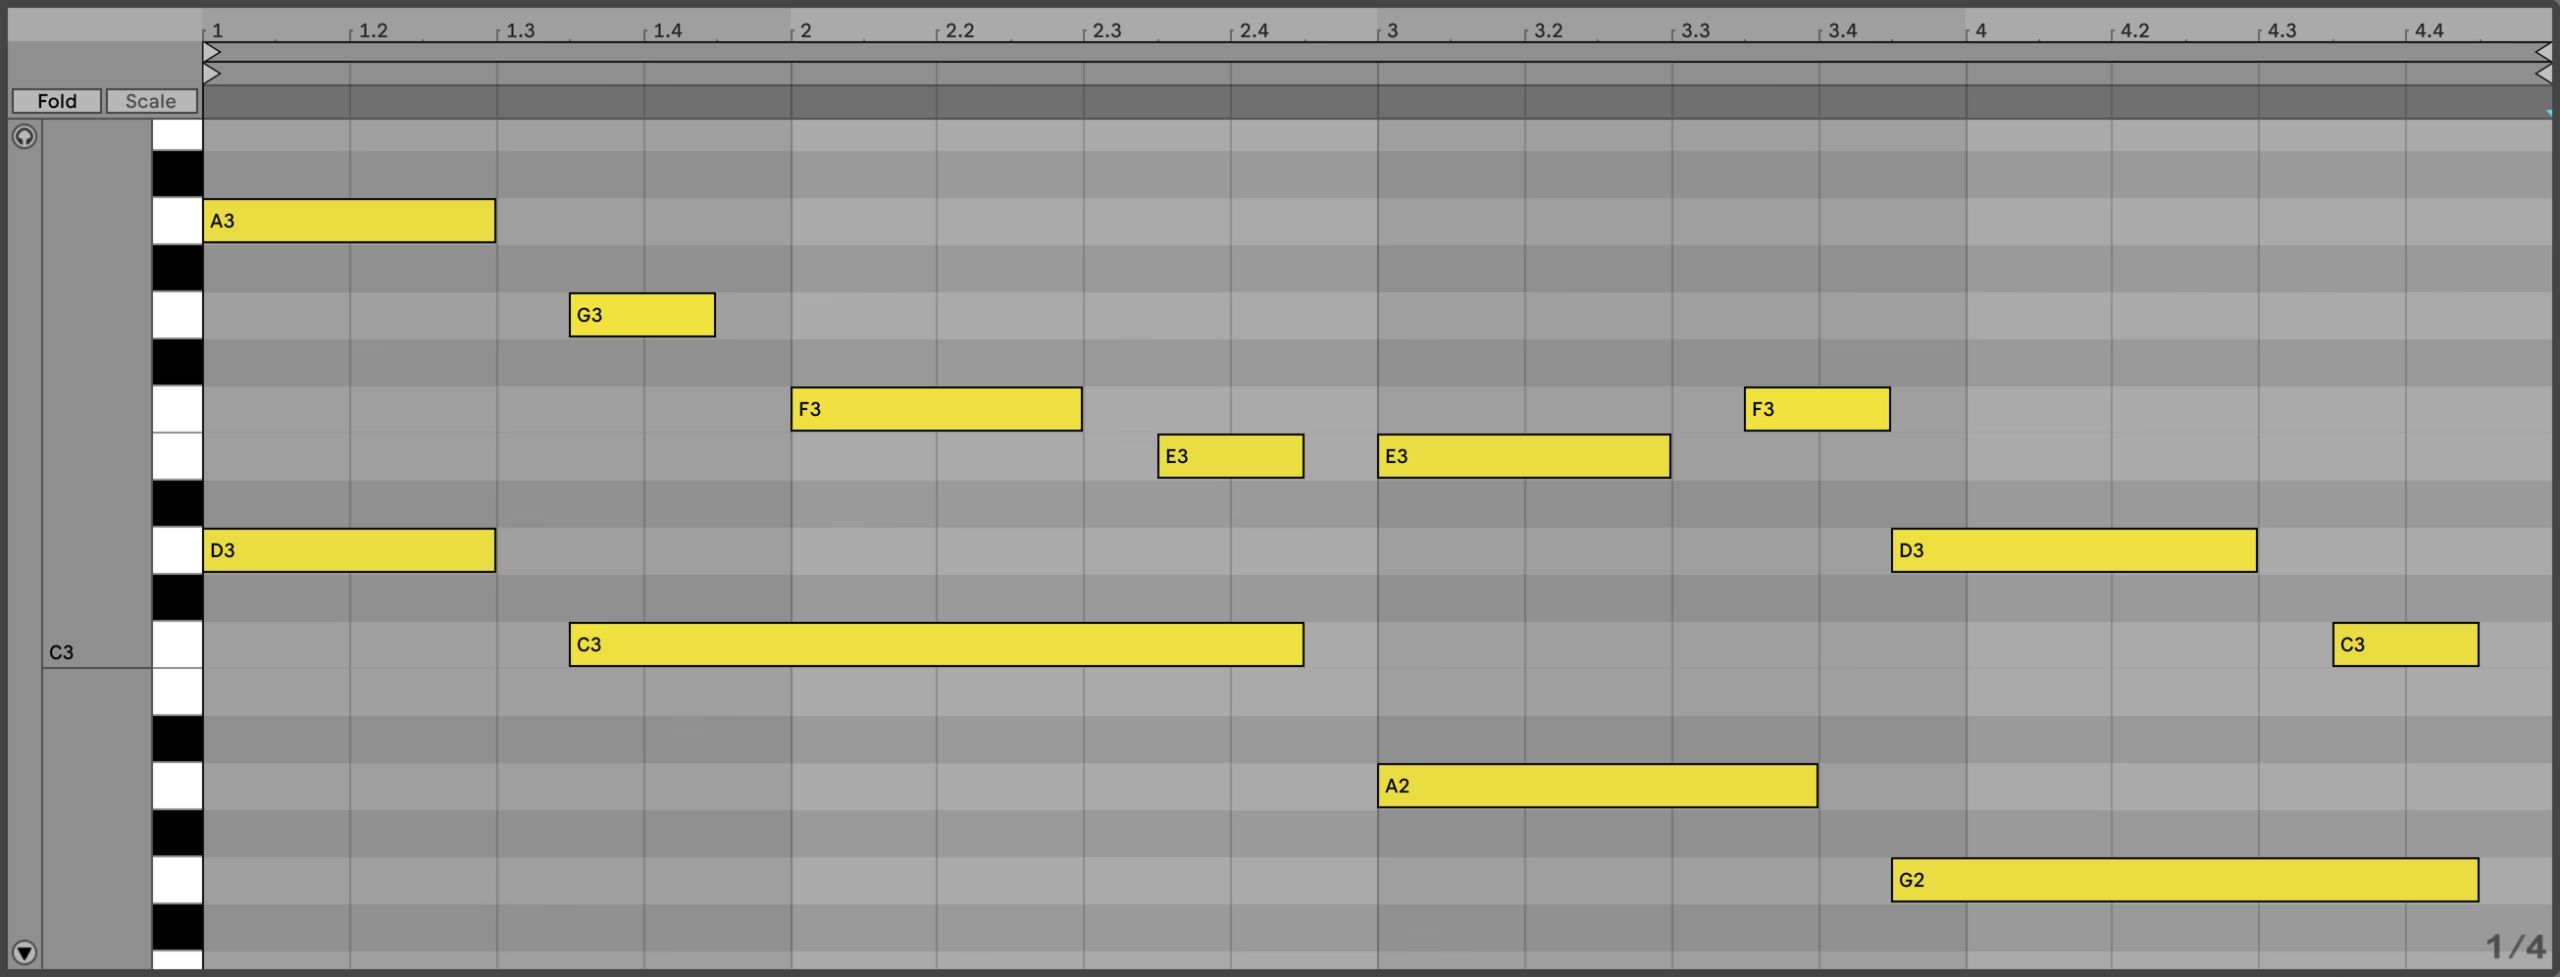
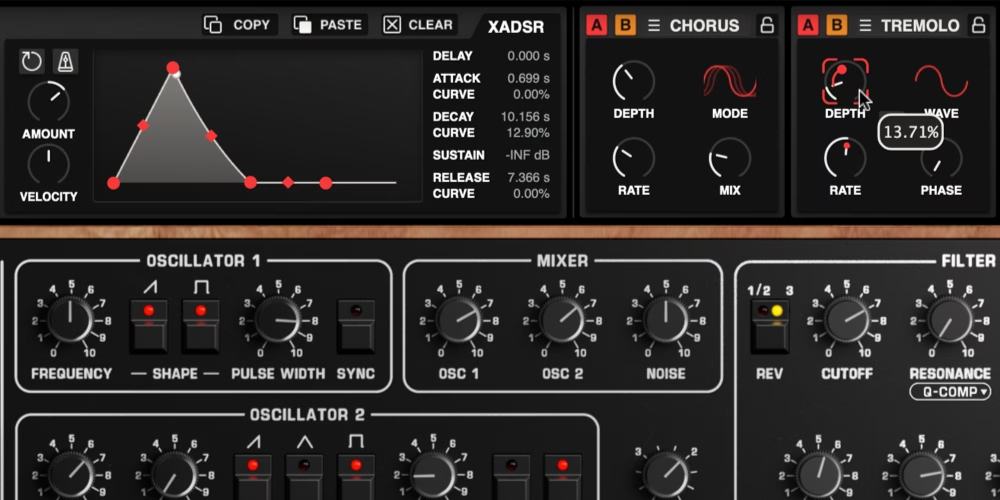
One of my favourite GForce additions is the XLFO and XADSR system, which lets you assign an extra LFO and envelope to almost any parameter in the synth. To make the tremolo effect more interesting, I used the XADSR to modulate the depth and the rate, so the tremolo fades in and out as you play a chord, rather than always running. Using XLFO and XADSR to modulate less obvious parameters like this is a great way to make your patches sound more alive.
Pressed Sync Bass
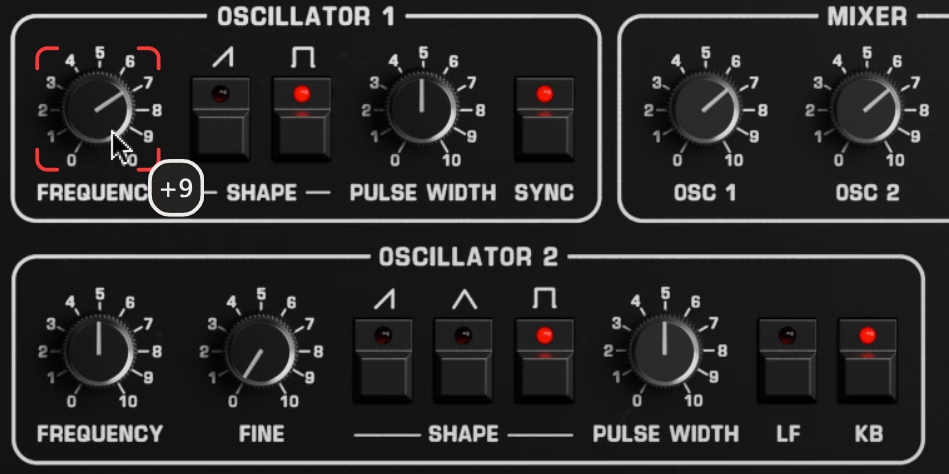
After a four-bar intro, the bass enters, and this is my Pressed Sync Bass preset. This sound uses oscillator sync, a great way to create complex waveforms. In Prophet-5, enabling the Sync button locks oscillator 1’s waveform to oscillator 2’s. As you raise oscillator 1’s pitch, the note itself stays the same (because the pitch is locked to oscillator 2), but the harmonic character changes dramatically. In this patch, I have oscillator 1 set to +9 semitones, which, to me, produces a Wurlitzer-like electric piano tone.
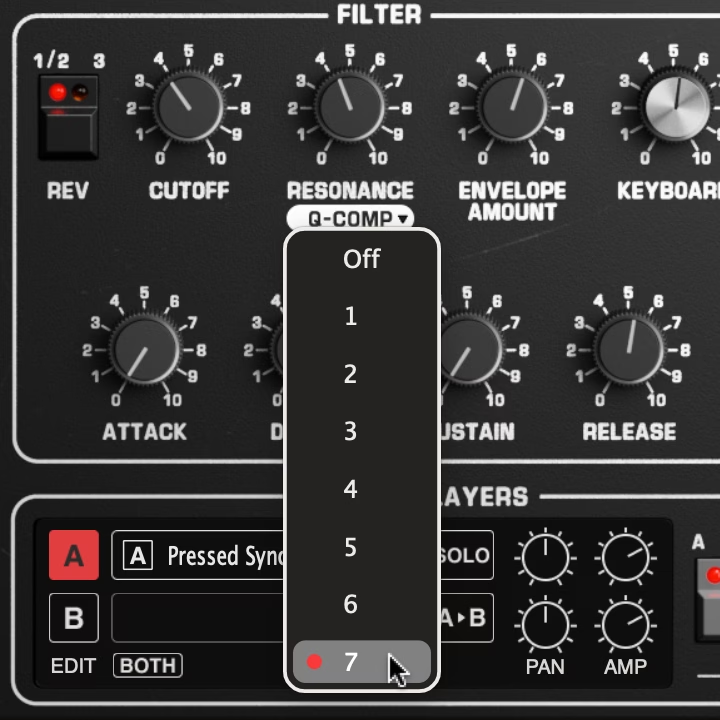
The patch also has high filter resonance with a long four-second decay envelope, so each note has a slow, sweeping filter movement. One thing worth knowing about the GForce Prophet-5 specifically is the Q Comp setting. On many synths, increasing resonance reduces the low end, which is a problem for bass sounds. With Q Comp set to 7 here, the bass stays full even with the resonance cranked.
The Lead Sound
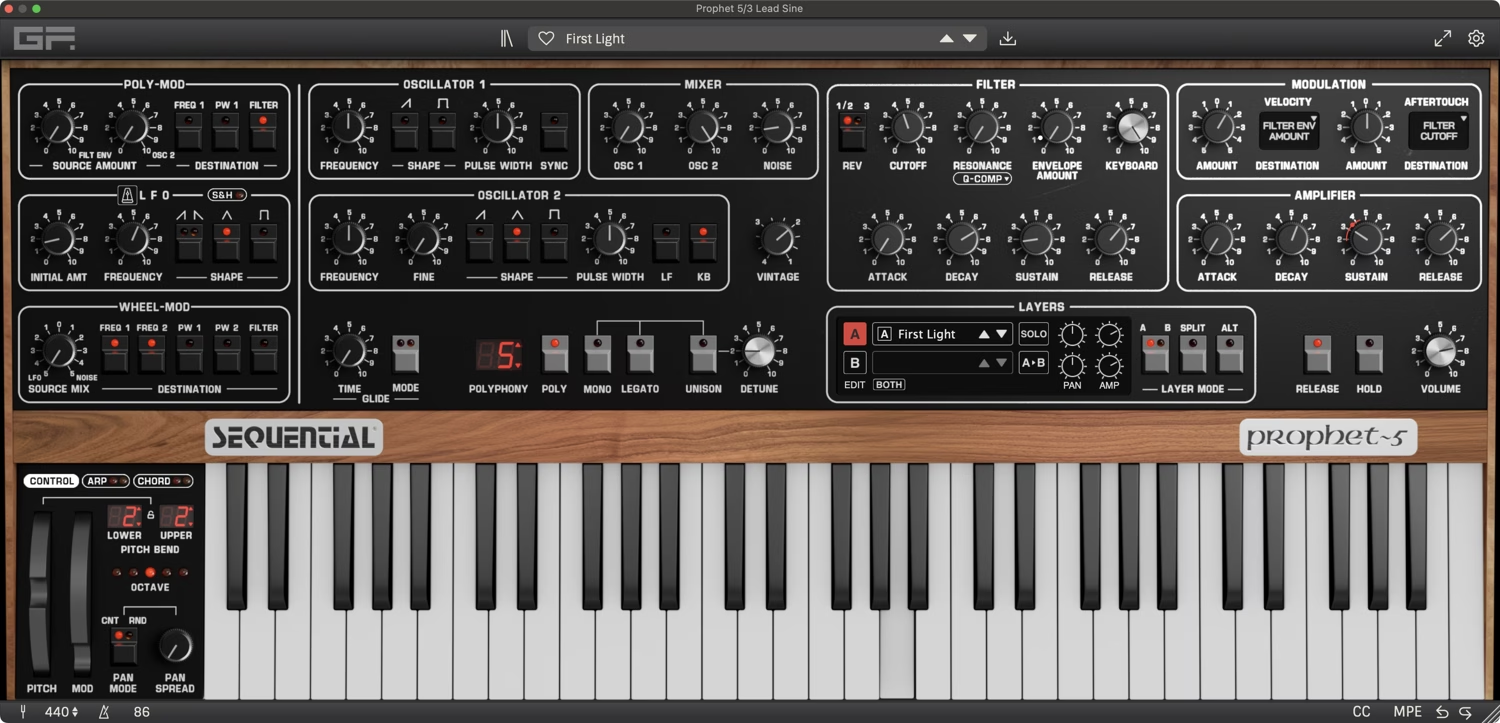
I wanted a lighter section for variety, so at 0:33 the chords drop out and a melody takes over. I used my First Light preset, which is a noisy sine-wave-style sound with heavy reverb. It uses a triangle wave from oscillator 2, with the filter cutoff set low to remove most of the upper harmonics, which pushes the sound toward something close to a sine wave. Keyboard tracking is enabled so that the filter follows the pitch of the notes you play, which prevents the higher notes from getting completely filtered out.
There’s also some white noise blended in, which gives a grainy texture. The Prophet-5’s onboard reverb is turned up quite high on this one, with the level set to around -6 dB, creating a bed of sound beneath the notes.
The Breakdown Pad
The breakdown section features the Escalante Basin patch, which uses Prophet-5’s dual-layering ability. GForce’s Prophet-5 lets you stack two completely independent synth patches together, which is perfect for creating richer, more complex sounds.
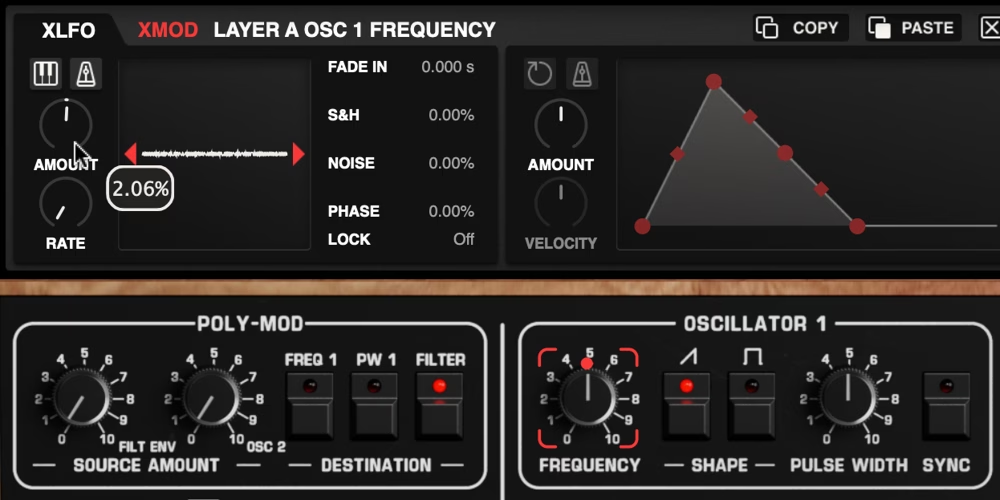
The Escalante Basin patch combines a warbly tape-style pad with a bright shimmer layer. For the tape-style instability in layer A, I have the XLFO set to the random waveform, with the modulation amount at 2% and the rate at the fastest setting, 0.008. At that speed and depth, it doesn’t sound like vibrato, and instead makes the pitch feel unstable and ‘warbly’, like an old cassette with bad tape.
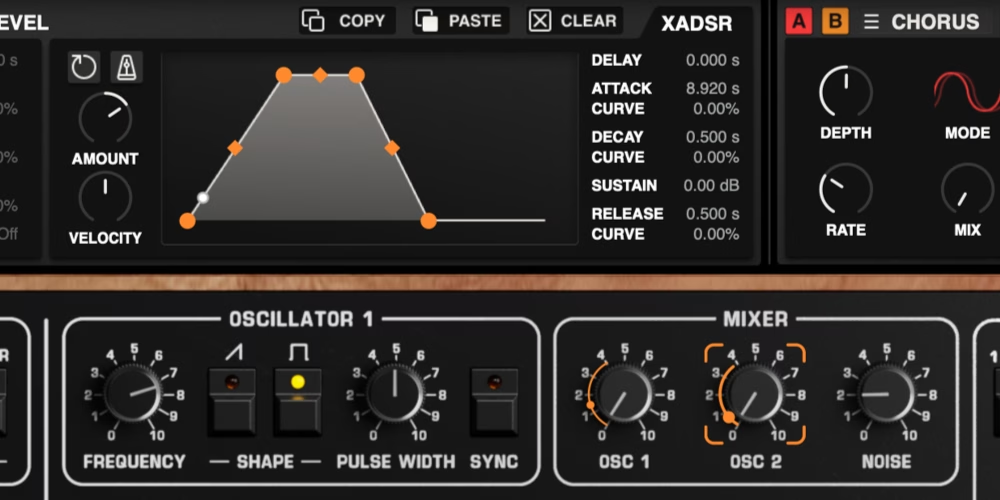
Layer B adds some shimmery high-end texture. The oscillators are tuned up an octave and 7 semitones, and I used the XADSR to slowly fade in the individual oscillators via the mixer controls, so you hear the +12-semitone Oscillator A before the +7-semitone Oscillator B.
The Drums
I wanted a trip-hop drum sound, so I used a sample from the Samplephonics Vintage Drum Breaks pack. The drum break already had the loose, dusty feel I was looking for, so most of the work was simply creating variation across the arrangement. Using a drum break like this means you’re working with a fixed audio loop rather than programming patterns, so creating variation required some creative effects.
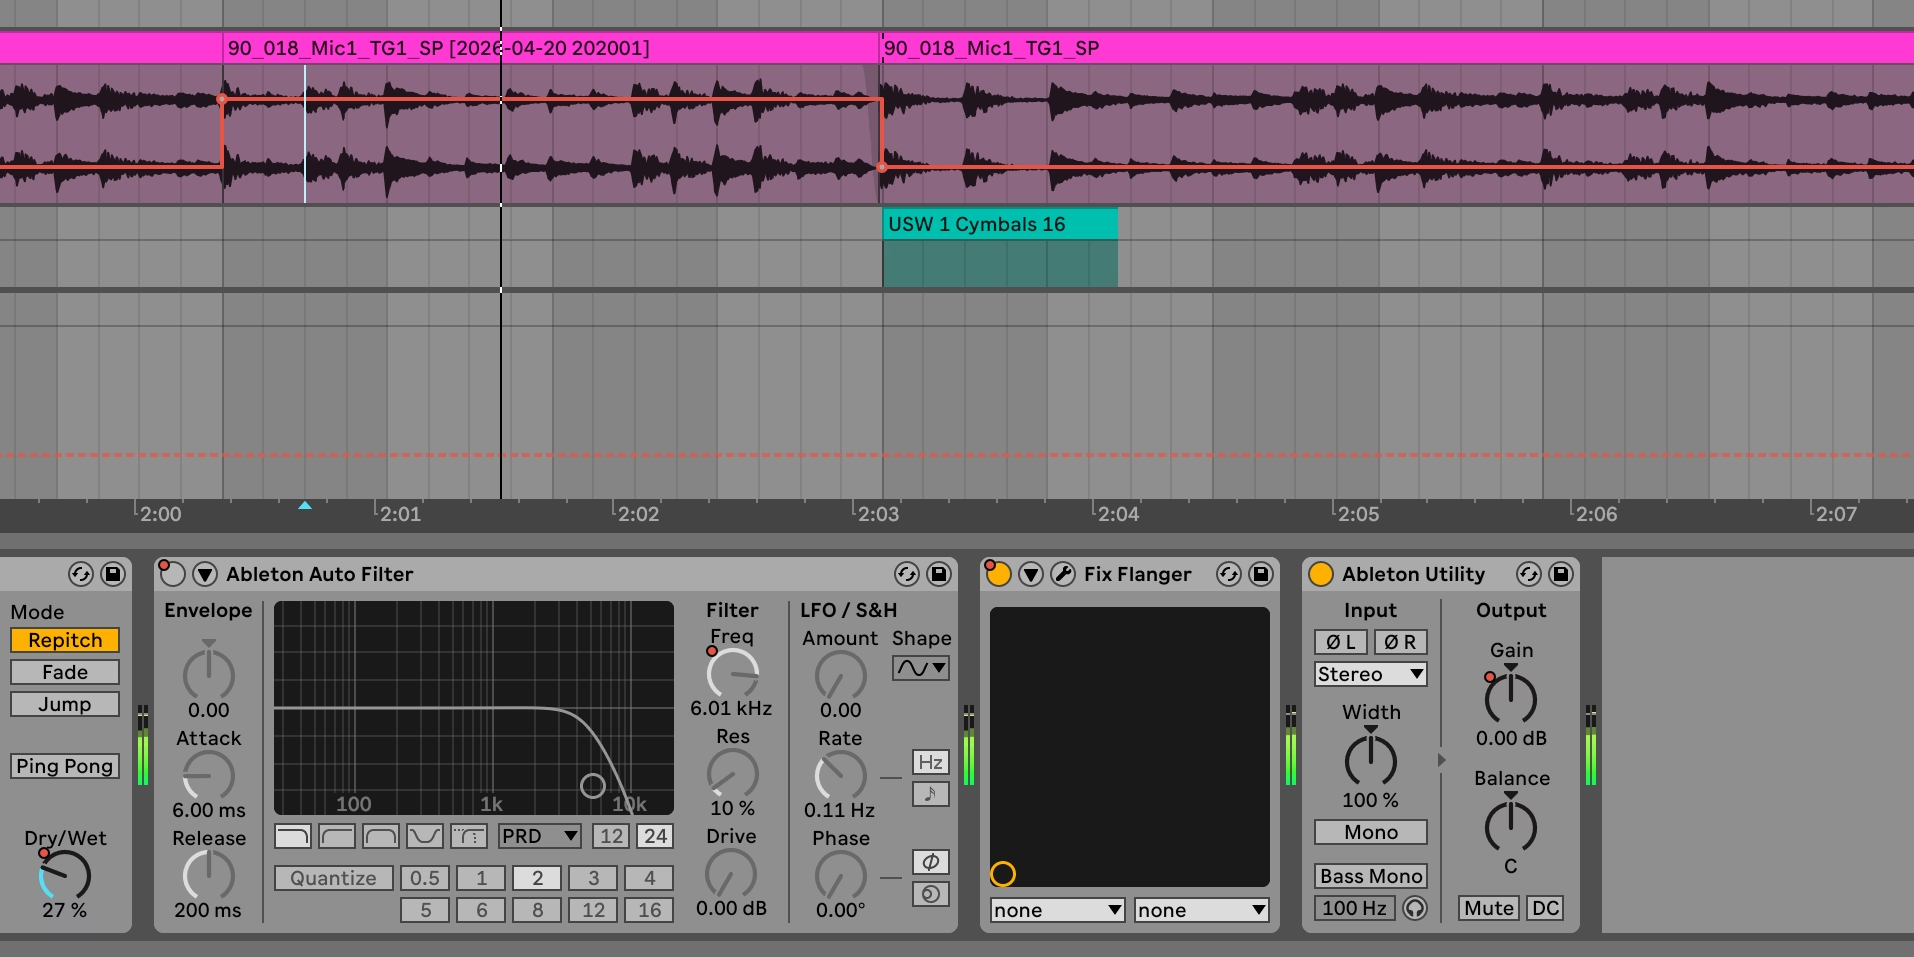
For the intro, I ran the drums through a bandpass filter to make it sound distant and muffled. For the quieter second section, I added a low-pass filter set to 6 kHz to take some of the brightness off, making it sound softer.
During fills, I added some Tame Impala-style flanger. I used the Softube Fix Flanger plugin with the Flange Zep Drums setting, automated to come in only during the drum fills. Towards the end, I used a stereo delay to quickly create some crazy drum fill sounds, and at one point I repitched the audio down to create a sampler-style slowdown effect.
Ableton Live Project
If you own GForce Prophet-5 and want to explore these sounds in a bit more detail, you can download the full Ableton Live project for my demo.
The project contains all of the synth patches used in the track, along with the arrangement, automation and effects. The only plugins used are GForce Prophet-5 and Softube Fix Flanger. Since the flanger is only used on the drums track, which has been frozen, you can still open and use the project even if you don’t own Fix Flanger.
The project is available in your Account > My Instrument > Sequential Prophet~5 > Download > “Reverb Machine – Redvale Dusk Project”
Please note that the individual drum samples have been removed from the project for copyright reasons.